xGEL Screen Shots
- Create/Open Project
- Specify Boring Geometry
- Assign Tests
- Collect Data
- Data Summary/Export
- Data Reports
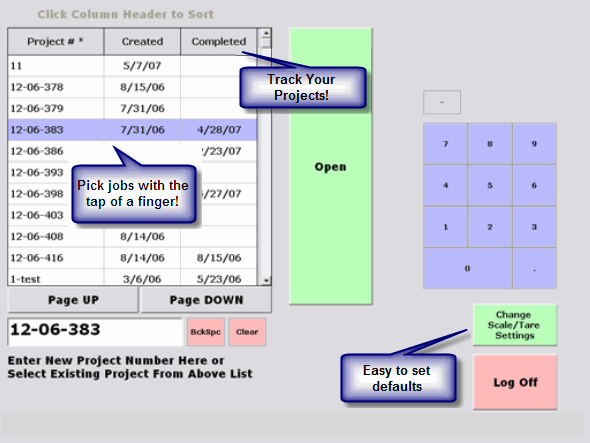
Create/Open Project
This is where you create a new project or select an existing project for data entry.
This screen also shows the testing status of the project so that at a glance you can see what has been completed and what is still in testing.
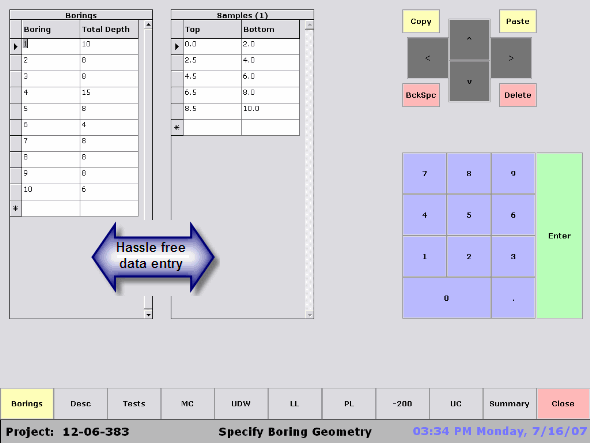
Specify Boring Geometry
This is where you specify the layout (Geometry) of the project.
Here you enter the number of borings and the depth zones that the samples came from.
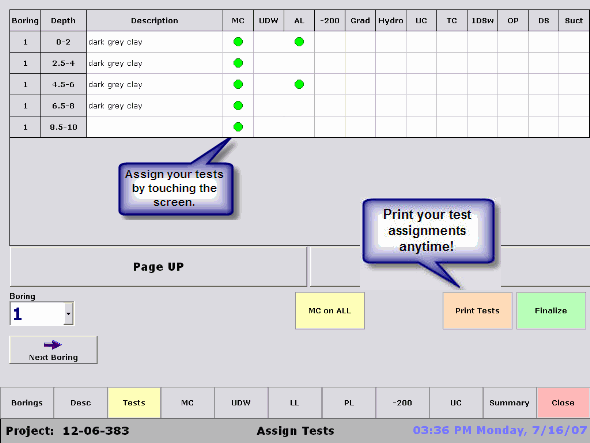
xGEL Test Assignment Screen
This is where you assign the testing for the job. Simply touch the appropriate cell and a yellow dot will appear, indicating a proposed test for that sample. When you finish your yellow dot assignments, you simply hit the 'Finalize" button to lock in your test assignments, whereupon the yellow dots turn to green and xGEL creates the appropriate electronic forms that are used for lab test data collection.
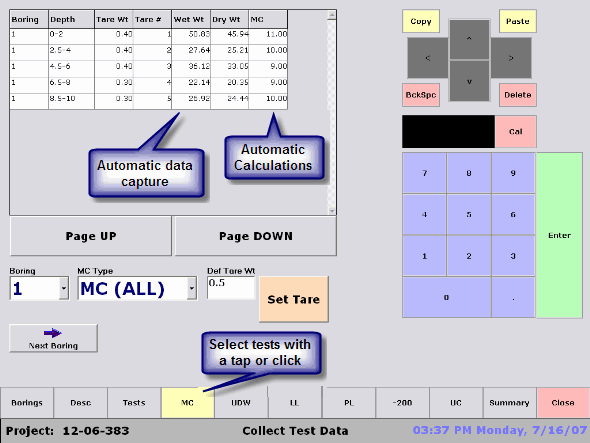
xGEL Data Collection Screen
This shows the data collection grid for the Moisture Content testing.
Other data collection sreens follow a similar, easy to use, structure.
The LabMate software automatically captures the weight reading from the scale and sends it to the xGEL database. On weighbacks the results are calculated and displayed in the rightmost column so you can make a real time assessment of the data.
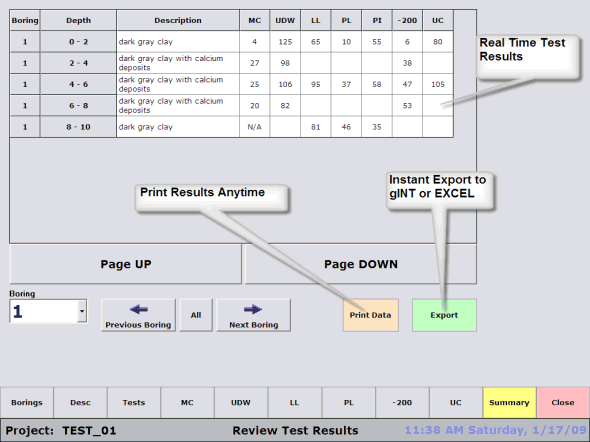
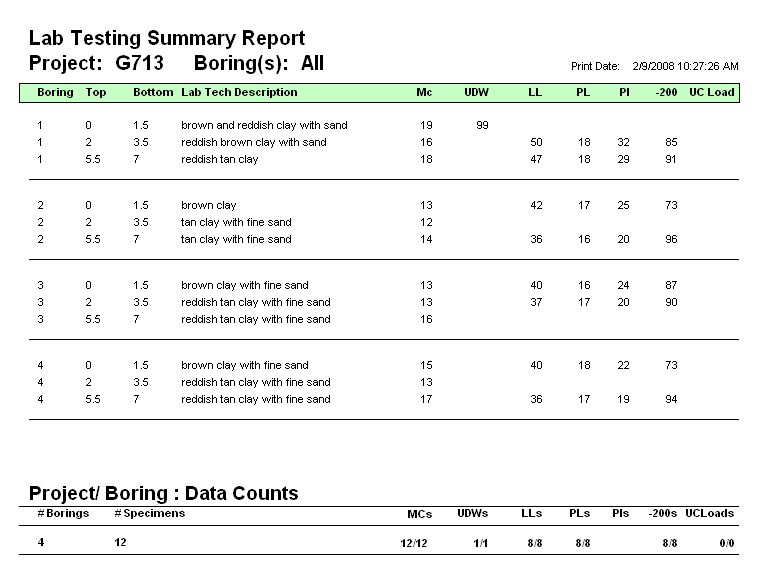
xGEL Test Results/Export Screen
This is where you can review the testing results and also see how your job is progressing.
You can also export the data at any time.
Export formats:
• gINT (.gpj)
• Excel (.xls)
• MS Access (.mdb)
EasyRead™ Data Reports More